How to Deep Clean Membrane Keyboard: A Simple Step-by-Step Guide
Published: 29 Jul 2025
A membrane keyboard is a common type of keyboard found in most homes and offices. It uses pressure pads under each key instead of mechanical switches. Over time, dirt, dust, and spills can get stuck under the keys. This affects how your keyboard works. In this post, you’ll learn how to deep clean a membrane keyboard safely, step-by-step.

How to Deep Clean Membrane Keyboard
Cleaning your keyboard may sound tricky, but it’s easy with the right steps. Here’s how to clean membrane keyboard deeply without damaging its parts.
What You’ll Need Before You Start
Before you start, gather these basic tools to clean your membrane keyboard safely:
- Soft brush or old toothbrush
- Isopropyl alcohol (70% or higher)
- Cotton swabs
- Microfiber cloth
- Keycap puller (optional)
- Compressed air can (optional)
Step-by-Step Guide to Deep Clean a Membrane Keyboard

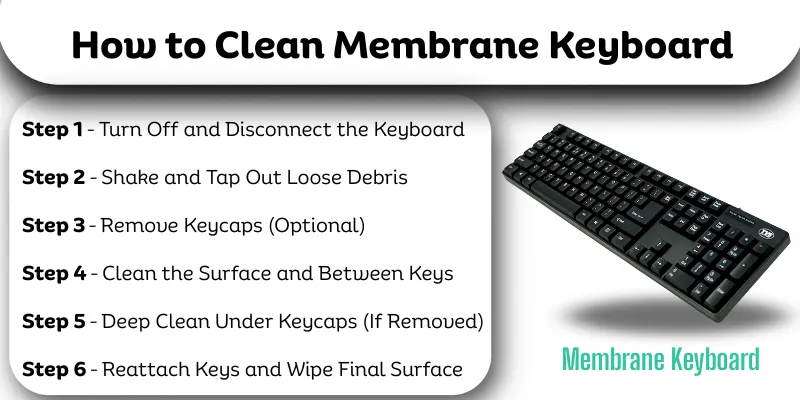
Step 1 – Turn Off and Disconnect the Keyboard
Always turn off your computer or unplug the keyboard. This keeps you safe and avoids accidental key presses during cleaning. If it’s a wireless keyboard, remove the batteries.
Step 2 – Shake and Tap Out Loose Debris
Hold your keyboard upside down over a table or cloth. Gently tap it to shake out crumbs, dust, and dirt. Use a soft brush or paintbrush to sweep away anything stuck in the gaps.
Step 3 – Remove Keycaps (Optional)
If your keyboard allows it, gently pull off the keycaps using a keycap puller. Be careful not to break any clips. This step helps you clean under the keys more deeply.
Step 4 – Clean the Surface and Between Keys
Add a few drops of isopropyl alcohol to your microfiber cloth—just enough to make it damp. Wipe across the keyboard surface to remove dirt, fingerprints, and germs. Use cotton swabs dipped in alcohol to clean between keys.
Step 5 – Deep Clean Under Keycaps (If Removed)
With the keycaps off, clean the exposed areas using a cloth and alcohol. Make sure you reach the corners and flat parts under each key. Let it dry completely before putting the keys back.
Step 6 – Reattach Keys and Wipe Final Surface
Once everything is dry, press the keycaps back into place gently. Wipe the whole keyboard again with a dry microfiber cloth for a clean, polished look.
Conclusion
So guys, now we are going to wrap up this article. We’ve covered how to deep clean a membrane Keyboard step by step in a simple and beginner-friendly way. A clean keyboard not only feels better but also lasts longer. I personally recommend deep cleaning once every few months to avoid dirt buildup. It’s simple, safe, and keeps your workspace fresh. Still confused about any step? Ask in the comments and I’ll guide you!
FAQs About Cleaning Membrane Keyboards
Here are some common questions beginners ask after learning how to deep clean their membrane keyboard.
Yes, you can remove keys from most membrane keyboards, but gently. Use a keycap puller or flat tool to pop them out. Not all models allow this, so check your keyboard’s manual. Always take care not to damage the clips under the keys.
Turn off your laptop and remove the charger. Use a clean brush or air spray to clear dust. Wipe gently with a cloth dampened with a few drops of isopropyl alcohol. Avoid using too much liquid near the keys.
For regular use, clean your keyboard every 2 to 3 months. If you eat at your desk or have pets, you may need to clean it more often. Light weekly dusting also helps reduce buildup. A clean keyboard feels better and lasts longer.
It’s better to avoid water. Use isopropyl alcohol (70% or higher) instead, as it evaporates quickly and doesn’t harm electronics. Water can seep into the keys and cause damage. Always use a slightly damp—not wet—cloth.
Use a cotton swab dipped in alcohol or a soft brush to clean between keys. Gently wipe away dirt and dust. Avoid sharp objects—they can damage the keyboard. Always let it dry before using again.
Sticky keys may still have residue under the caps. Try removing the keycaps and wiping underneath with alcohol. Let everything dry before snapping them back. If that doesn’t help, deeper cleaning may be needed.
Sometimes, yes. Dirt under the key can block contact and cause issues. Cleaning under the keycap may fix it. But if the problem continues, the keyboard may have hardware damage.
Yes, it’s safe if used properly. Hold the can upright and use short bursts to avoid moisture buildup. It’s great for blowing out crumbs and dust without taking the keyboard apart. Don’t shake the can before use.

- Be Respectful
- Stay Relevant
- Stay Positive
- True Feedback
- Encourage Discussion
- Avoid Spamming
- No Fake News
- Don't Copy-Paste
- No Personal Attacks

- Be Respectful
- Stay Relevant
- Stay Positive
- True Feedback
- Encourage Discussion
- Avoid Spamming
- No Fake News
- Don't Copy-Paste
- No Personal Attacks


